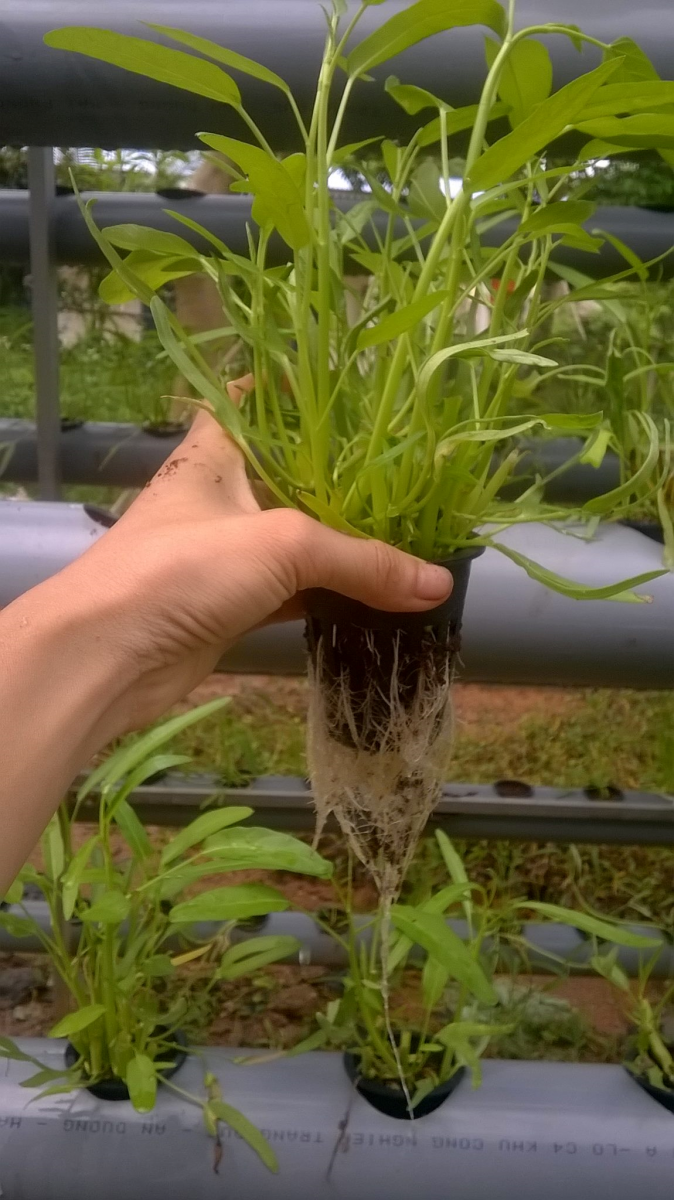
Recirculating hydroponics is a soilless farming method that utilizes a nutrient solution reservoir and a pump to continuously circulate nutrients through hydroponic growing tubes. As the solution moves through the system, it provides oxygen-rich nutrients, promoting faster and healthier plant growth.
The nutrient solution used in this recirculating hydroponic system is Hydro Green, a government-approved solution for safe hydroponic vegetable cultivation.
The Experimental Research Station in Dinh Hoa Nursery has successfully implemented and put into operation an outdoor recirculating hydroponic system without a greenhouse. This method offers numerous practical benefits, including simplicity, affordability, high productivity, and disease-free vegetables. Moreover, it can be adapted for small spaces, such as balconies, rooftops, and any well-lit area.
Step-by-Step Guide to Setting Up a Recirculating Hydroponic System
Step 1: Preparing Equipment
-
Plastic cups or net pots: Use dark-colored or opaque cups to prevent light penetration, which enhances root growth and prevents algae growth inside the system. Drill holes around the cup for roots to access the nutrient solution. These cups/net pots, combined with a growing medium, support the plant’s stability.
-
Seedling trays, plastic baskets, and growing medium: Suitable media include coconut coir, sterilized straw, biochar, and corn silk. Biochar, with its black color, is especially useful for blocking light and promoting root growth.
Step 2: Preparing Seedlings
Method 1: Direct Seeding in Net Pots
-
Sow 1-2 seeds per net pot filled with coconut coir.
-
Spray the nutrient solution lightly on the growing medium.
-
Keep the seed trays in a cool, dry place, avoiding direct sunlight. (See Image 1)
Method 2: Seeding in Trays
-
Use plastic trays lined with coconut coir and organic fertilizer.
-
Place trays in a cool, shaded area, ensuring consistent moisture for seed germination.
-
Once seedlings reach 2-3 cm in height, gradually expose them to sunlight for 3-5 days before transplanting them onto the hydroponic system. (See Image 2)
 |
 |
Image 01 Image 02
Step 3: Transplanting Seedlings to the Hydroponic System
|
After 3-5 days, select healthy seedlings with 3-5 cm roots and no signs of disease, stunted growth, wilting, or root rot. Gently transfer the seedlings to the hydroponic system, avoiding damage to leaves and roots. (See Image 3)
|
 |
|
(Image 3 – A-frame hydroponic rack at Dinh Hoa Nursery) |
Step 4: Nutrient Solution Preparation
-
The best hydroponic solution for vegetables is Hydro Green.
-
Mixing instructions:
-
Dissolve 0.7ml of Solution A and Solution B into 10 liters of clean water (avoid pouring them directly together).
-
Check Total Dissolved Solids (TDS) levels:
-
Optimal range: 800-1000 ppm.
-
Above 1000 ppm? Add more water to dilute.
-
Below 800 ppm? Add more nutrient solution, then recheck with a TDS meter. (See Images 4 & 5)
-
-
 |
 |
|
Image 04 |
Image 05 |
Step 5: Water Management & Plant Care
The recirculating hydroponic system automatically pumps and replenishes water. However, regularly check the water level in the reservoir and refill when necessary.
Pest & Disease Control:
-
In urban settings (e.g., high-rise apartments, rooftops), pest issues are minimal.
-
Regularly prune yellow leaves and remove diseased plants to prevent fungal and bacterial spread.
Step 6: Harvesting Vegetables
 |
|
Article & Images: Agricultural Engineer Nong Thi Tham